Friday, May 23, 2008

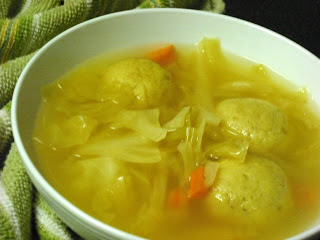
Matzo Ball Soup


This is the recipe for a basic matzo ball spiced up a little. In addition to the vegetables, some unexpected ingredients are used in the stock to enhance the flavor. This is the Jewish take on chicken dumpling soup; perfect for cold or sick days.
Matzo balls:

3/4c matzo meal
dash pepper
1 tsp kosher salt
2 eggs
2 tbsp veg oil
Soup:

1 small cabbage head, chopped
2 1/2 quarts imitation chicken broth
2 carrots, diced
3-4 celery stalks, diced
1/4tsp paprika
1 tsp garlic salt
1/2 tsp onion powder
1 tbsp vinegar


Heat the soup ingredients in a large pot.
Combine the matzo ball ingredients and allow to chill for 15-30 minutes. Form into small balls and drop into boiling soup.
Cover tightly and allow to cook for 20 minutes. Serve hot.

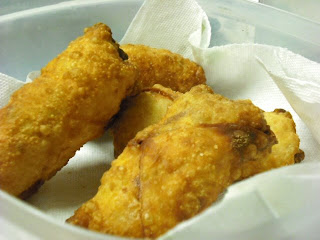
Famous Egg Rolls

I'll begin this one with a disclaimer: this isn't a light dish. It's vegetarian and only uses vegetable oil, but through trial and many errors I've found there are few ways to successfully make an egg roll, and only one way to make a great egg roll. Deep frying is required, although you can make do by pan frying. Still, deep frying is easier and preserves better.

Aside from being fried these are phenomenal. One recipe tends to make a lot so they're good for bringing to parties or for an especially big dinner crowd. I like to serve them with tamari, but any kind of dipping sauce works.


Veggie Egg Rolls:


1 package (15 count) egg roll wraps
1 quart veg oil, for frying
1 beaten egg
Filling:
1/2 cabbage, shredded (I used a mix of red and green cabbage)
1 nest cooked sai fun
1/2lb cubed tofu
1 shredded carrot
1/2 small onion, finely diced
1 tbsp kosher salt
Combine ingredients in a large bowl. Put a few tablespoons of filling into the center of the wrap.


Fold the right corner of the wrap over to the left, the top and bottom corners to the center, and roll toward the furthest left edge. Use a little egg as a glue to hold the edges together. Finish the rest of the egg rolls.


Place a fryer into the oil and slide one of the egg rolls in. Let it cook for 2-3 minutes, then flip to the other side to brown. Remove from oil onto paper towels. Repeat for each egg roll.


Allow to cool for a few moments and serve.


Six Strand Bread

I love braided breads; being able to put artistry back in the kitchen is a passion of mine. I've done three strand loaves for awhile, but chose to tackle something decidedly more challenging this week. I made mine with the regular sourdough, but any type of dough will work. Another fun thing to do is brush filling with cinnamon or cheese between the strands, but that's for another time.


The best resource on this bread is a video I found on YouTube, so thank you MayaSophia! She gives a great visual as to how to braid these loaves, otherwise my explanations would just be confusing.


The first step for me was to sponge the bread. I took a photo to show what sourdough sponge should look like:


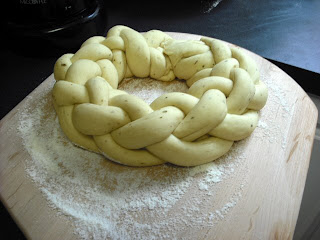
The next step was to mix the dough and let it rise. I then divided it into six parts and rolled each into a snake, pinching them together at the top:


Then comes the braiding, which is demonstrated in the video:


Continue to braid until the entire loaf is finished, then pinch and tuck each end over. Set it on your floured peel and allow to rise for 1 hour.


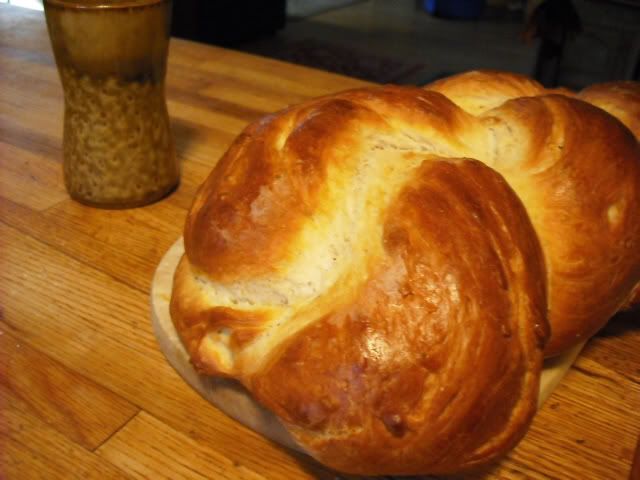
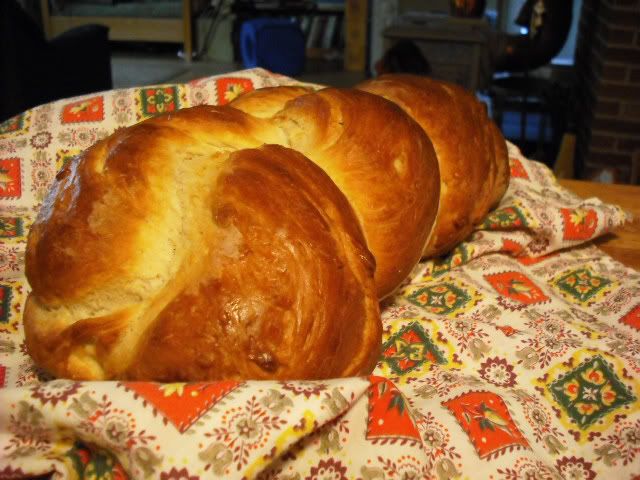
Brush the loaf either with egg or olive oil (used here) and allow to bake at 400 for 30-45 minutes, or until golden brown. These loaves typically take longer since they're more dense. What I love about braided breads is that you can break them apart and dip the little sections in oil or sauce, so this is pictured next to spinach dip (see Spinach Artichoke Dip Rediscovered for recipe).


Kitchen Must-Haves

Since my entries are so full of little items that I love, I decided to post exactly what these are and where you could procure them. Everyone has a preference, and whatever gives you the best results is what you should stick with. These are all things that help me keep my kitchen organized and accessible; I'm rarely left up a creek when I have my versatile equipment on hand! With that said, here is the hall of fame:

KitchenAid Countertop Mixer:


This is the centerpiece of my baking world. As you can see, there are three attachments, which I've waxed on about in my "Fun with Sourdough" entry. It's a lot like a good boyfriend -- steady, non-reactive, and can handle heavy work without complaint :] It's not 100% necessary to own one of these to be a great baker, but if you already have one it's time to use it! You can seek them out used, but because it comes with a lifetime guarantee, it's probably wise to get a new one if you plan on using it a lot. I've seen them sold at Williams-Sonoma in a million different colors and even different sizes, they range from $250 to $600.


Bamboo Cooking Utensils:


Bamboo is an extremely eco-friendly product; since it's technically a grass, you're sparing some lucky trees too! They also perform incredibly well. Dishwasher safe, lightweight yet strong, these also do not scratch cookware. Ideal for any kitchen, they're also a bargain at a few bucks per utensil.

Silicone Cookie Sheet:
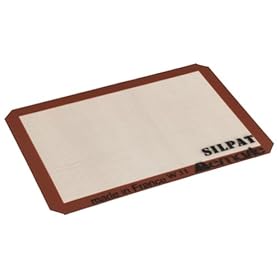
This thing is perfect for baking cookies -- it completely eliminates your need for evil cooking spray! It keeps your baking sheets clean so you don't have to wash them nearly as much. It requires minimal maintenance in and of itself, just a rinse with some hot soapy water after use. My only caution is to not use it in temperatures over 450, or you'll wind up with a crunchy plastic sheet.
Snapware Containers:

These containers are absolutely central to the organization of my kitchen. They're airtight, so almost anything can be stored in them. You know how there's always a sprinkling of flour or sugar that falls out when you're measuring ingredients from the bag? That's not an issue with these. I label them and use them to store different kinds of flour and sugar. I'm sure my kitchen would be a much messier place without these guys to help me keep things in order.

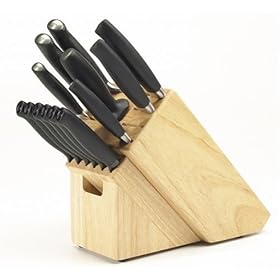
Oxo Good Grip Knife Set:These knives are like none I've ever used. They're sharp as a razor, but because of the soft grip they have a safety aspect as well. The set contains 14 knives so you don't have to worry about buying anything else. Worth every penny, these should last forever if you take care of them.
Microplane Zester Grater:
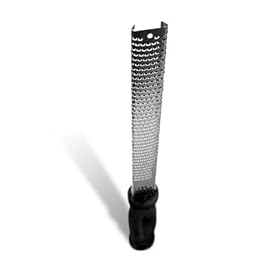
This item completely lives up to its reputation -- lightweight, dishwasher safe, it grates through hardest cheeses like butter. You can usually come by them for under $10 at kitchen supply stores. This is absolutely essential if you grate your own cheese; it leaves piles of feather light shavings instead of chunky slices like a traditional grater. It doesn't work particularly well on soft cheeses, but that's what regular graters are for.


Thursday, May 22, 2008

Baked Garlic Dip


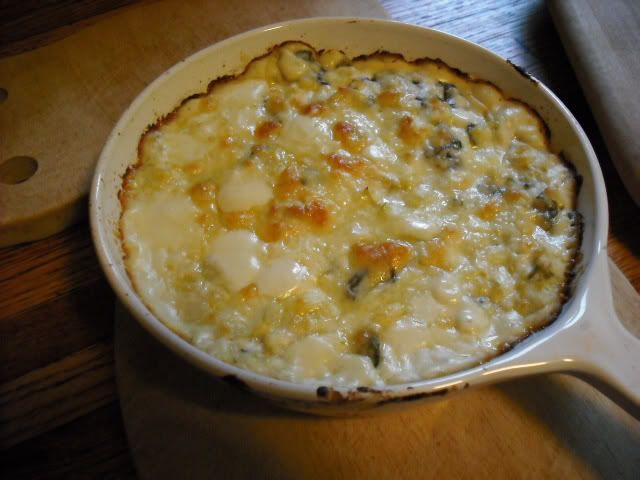
This is my favorite thing to serve alongside the Italian sourdough -- a creamy, garlic-ey dip that tastes a lot more fattening than it is. I read the basis of the recipe in the Herb Companion and made a few changes. For example, the original recipe calls for scallions while I chose to substitute with more garlic -- ripe garlic cloves tend to eminate a richer scent and flavor. Try baking this in a cast iron or stoneware dish so it stays hot and perfect.


Baked Garlic Dip

3 cloves garlic, chopped finely
1/2c cooked spinach
3-5 artichoke hearts, chopped
~2tsp fresh oregano, chopped finely
7 oz fage (Greek low fat yogurt, use plain regular yogurt otherwise)
3/4c light mayonnaise
1c shredded cheddar
1/4c shredded parmesean
salt to taste

Heat the mayonnaise and fage in a saucepan over medium-low heat. Preheat oven to 450. Add garlic, oregano and artichoke hearts; stir occasionally until simmering. Add cheddar and stir until melted, add spinach and salt. Pour into a baking pan or small casserole dish and sprinkle parmesean over the top. Bake for 10 minutes or until bubbling and beginning to brown. Allow several minutes to cool before serving.

Tuesday, May 20, 2008

Mom's Oatmeal Cookies

My mom has always taken a lot of pride in her oatmeal cookies; rather than being dense and crumbly, these are chewy and surprisingly light. She prefers to include nuts and raisins, but many people like chocolate chips or just plain oatmeal. Experiment to figure out what you prefer, and don't forget to have fun!

Oatmeal Cookies:
1/2c room temp butter
1/2c white sugar
1/4c brown sugar
1 egg
1 tsp vanilla extract
3/4c all purpose flour
1/2 tsp baking soda
1 tsp cinnamon
1/4 tsp kosher salt
1 1/2c quick cooking oats
1 c raisins, nuts or chocolate chips

Preheat oven to 375 degrees. Cream butter and sugars together, add egg and vanilla. Combine dry ingredients (no oats) and combine with creamed mixture. Add oats and raisins. Pour into a greased baking pan, and cook for 10-15 minutes. Let cool completely before cutting into bars or squares.

Southwest Salsa

This is one of my favorite salsa recipes because it's easy, the ingredients can be found in any grocery store, and it contains enough different flavors to put plain tomato salsa to shame. I encourage everyone to use as fresh of ingredients as they can find, but the only place where it really makes a difference is in the cilantro and tomatoes. Since I can't stand tomato seeds I pit mine beforehand, but if you don't mind them it doesn't make much of a difference. Enjoy!

Southwest Black Bean Salsa:
15 oz kidney beans
15 oz black beans
15 oz fresh or canned corn
1/2c chopped onion
2 tbsp finely chopped jalapenos
1 tbsp chopped fresh cilantro
1tsp vinegar
1 chipotle pepper, very finely chopped (one can usually contains 4-5 peppers)
15 oz diced tomatoes
3 cloves garlic, finely chopped
1/2 tbsp salt

Combine all ingredients. Allow to chill overnight. Who knew it could be this easy?!

Honey Braided Challah

This is a great holiday bread and doubles as a nice breakfast loaf. It's sweet without being demanding and is perfect with cream cheese or honey butter. Many traditions include seeds or certain herbs sprinkled over the top; sesame seeds work well for this particular loaf.

Honey Cinnamon Challah:

7c bread flour
1 tbsp kosher salt
1/2c agave nectar (low glycemic sweetener, check health food stores or well stocked grocers)
2 packets of yeast dissolved in 1/3c warm water
1/2c veg oil
2 tbsp apple pie spice
4 eggs
1c boiling water
1/2c cold water
1 egg + 2 tbsp honey + 1 tbsp water (set aside)

Beat eggs in a bowl. In separate large bowl mix oil, nectar, spices, salt and add boiling water. Stir until completely dissolved. Add cold water, stir, and add yeast water -- keep in mind that the mixture should be warm, not hot, before the addition of yeast. Add eggs to the large bowl. Combine flour 1/2-1c at a time, as certain climates require more or less of it. If you're kneading by hand, knead for about 15 minutes or until smooth and elastic; if you're using a bread hook it takes around five to ten minutes. Place loaf into a greased bowl and let rise, covered, in a warm place for an hour or until doubled in size.

Before punching the dough down, remove from the bowl and slice into thirds with a sharp knife. Knead each round for 2-5 minutes and use the sharp knife to divide each into thirds again. Roll each section into a "snake" about 1-2 inches in diameter. Pinch the top ends together and braid down the loaf, then pinch the bottom ends and tuck under. Repeat this with the 2 remaining rounds and let each rise on a greased baking sheet for 30-45 minutes. Right before the loaves are ready to go in the oven, take a pastry brush and coat each with the egg and honey mixture. Make sure to cover all exposed areas of the loaf except for the bottom. Sprinkle seeds if desired.

Preheat the oven to 450 with your baking stone, and reduce to 350 for the actual baking time. If you're operating with a baking sheet only, flour with cornmeal or semolina and allow it to preheat. Place the loaf on a greased large plate or a floured peel and slide it onto the baking stone or sheet. Allow to bake for 20-30 minutes or until loaf is a deep golden brown.

Wednesday, May 7, 2008

White Peach Breakfast Tart

This is a specifically modified version of the original breakfast tart, which is usually made with a combination of apples and jellies or jams. White peaches are especially popular in Japan for their light, delicate taste and aroma. This is another recipe where I add rosewater; if you don't like the effect this brings feel free to leave it out or replace with vanilla extract. The olfactory taste of roses combined with fruit is especially decadent; soft and sweet without a hint of tartness. The yogurt takes the place of richer alternatives like whipped cream.

Tart crust:
~2 tbsp butter
2 eggs
1/8tsp kosher salt
1/2c flour
1/2c milk
2tbsp sugar

Grease cake pan with butter. Combine remaining butter with other ingredients, and bake at 400 degrees for 20 minutes.

Filling:
4 oz container vanilla yogurt
4 oz can white peaches (check Asian markets)
2 tbsp peach preserves
a few drops rosewater if desired, use sparingly
1-2 tbsp confectioners sugar

Heat peaches, rosewater and preserves over medium-low heat. Spread vanilla yogurt over tart crust. Once fruit begins to simmer, remove from heat and pour evenly over yogurt layer. Sprinkle with confectioners sugar and either serve hot or chill until ready to eat.

Vegetable Sai Fun (Stir Fry Noodles)

I LOVE sai fun! Also known as bean threads, mung bean noodles, glass noodles, or Chinese vermicelli, these are delicate clear noodles that cook quickly and absorb flavors fabulously. They can be used in darn near anything -- as noted, I love to use them in spring and egg rolls. This could also be called my "everything" stir fry, since the concept originated in a rush of leftover fried rice and precooked sai fun.

This can be made with or without rice. I definitely wouldn't advocate making a fresh batch of it just for this recipe; it can spruce up the texture if you have some leftovers though.

Vegetable Sai Fun:

3 nests sai fun (apx. 1 1/2c cooked)
1/2 lb extra firm tofu, cubed
2tbsp olive oil
1/3c chopped water chestnuts
1/3c peas
1 grated carrot
1c raw chopped cabbage
4 oz can bamboo shoots
1/4c chopped onion
2 cloves garlic, finely chopped
2 tbsp tamari or soy sauce
1/2c cooked rice (optional)

Boil sai fun for 3-5 minutes or until soft. Strain and remove from heat. Steam cabbage and onion until softened, apx 5-10 minutes. Saute tofu with olive oil, garlic and tamari until lightly browned in a large skillet or wok. Add cooked sai fun and all other ingredients over medium heat, toss with spatula every few minutes until noodles start to become crispy and brown, apx. 15-20 minutes. Serve hot with tamari or schezuan sauce for a spicier taste.

Portobello Linguine

I promised I'd pass on the way to use those discarded asparagus stems! This recipe is a combination of Boursin sauce and a fabulous dish I had at La Grotta. La Grotta cooks seasonal fresh Italian food, down to making their own pasta. I recieved a sampler and was pleasantly surprised at the use of asparagus in the linguine; this is a simple recipe that SEEMS much more complicated. Great for fooling anyone you want to impress! :]

Portobello Linguine

Sauce:

1 (8 oz) package neufchatel cheese or low-fat cream cheese
3 finely chopped garlic cloves
1/2c skim milk
1 tbsp oregano
1 tbsp basil
1/2tsp ground black pepper
1/3c grated asiago or other hard cheese
salt to taste

Heat all ingredients over medium-low heat until cheese melts and sauce begins to simmer. Remove from heat immediately.

Pasta:

1 box linguine (I like spinach linguine, but any kind works)
1 tbsp butter
~1 lb portobello mushrooms
1/2c finely chopped asparagus stems

Boil pasta and drain. You may use whole asparagus or just the stems, they should be chopped so finely that the fibrous texture is broken up. Heat the butter over medium in a skillet. Remove stems from portobellos and chop into as large or small pieces as you desire -- I prefer to chop them quite finely, but many people enjoy a "chunkier" dish. Saute the asparagus and mushrooms in the butter for 5-8 minutes and add to cheese sauce. Serve hot over linguine.

Healthy Comfort Dinner

I bet most of you didn't think comfort food and healthy would be in the same sentence! But in this meal, they are and they work wonderfully together. This is a compilation of things I've learned from my mother and the women at my synagogue; a few details are my own creation, of course. But this is a great standby on those nights I don't want to go all out, but I want a homemade, hot meal too.


The chicken isn't pictured due to my vegetarianism, but thanks to my fellow Shebrews I wasn't allowed to leave the seder kitchen without learning how to cook chicken breast. I'm including this recipe as well because it seems like it would go with the rest of the meal.


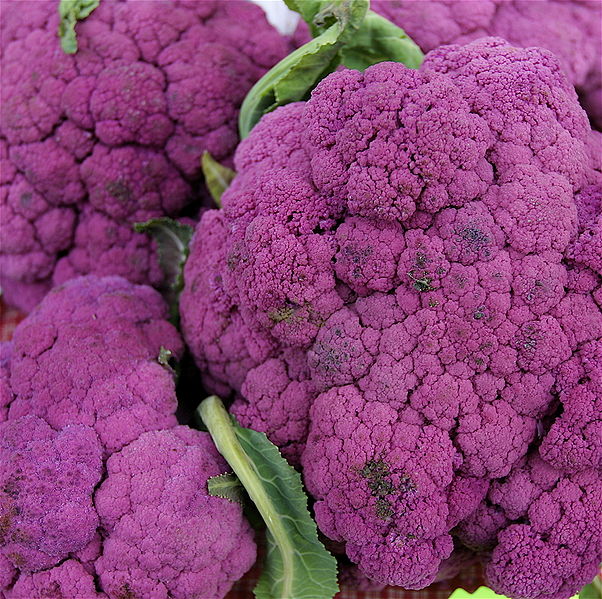
I ran across some gorgeous purple cauliflower at the grocery store and had to try it. In fruits and vegetables more color usually means a higher level of antioxidants and vitamins, so there seemed to be no harm. Sure enough, when I researched it later, anthocyanin is the antioxidant present -- the same as in red wine and red cabbage.


photo thanks to Wikipedia

Back to the meal. It's high in fiber, high in vitamins, and relatively low in calories while retaining LOTS of flavor!

Cauliflower and cheese sauce:
1 head cauliflower
1 1/2c milk
1/4c olive oil
2 tbsp flour
1/2c sharp cheddar
salt to taste

Chop the clusters from the cauliflower, and boil them until as soft as you desire. Heat the olive oil and milk on medium low, when hot add flour. Stir constantly while adding cheese unti2l melted and no chunks remain. Set aside to cool and thicken.

Cabbage:
1 small head cabbage, chopped or shredded
2 tbsp vinegar
salt to taste

Boil a large pot of water. Add vinegar and cabbage, allow to boil for 15-20 minutes or until desired softness. Add salt.

Roasted potatoes:

1 lb small Yukon potatoes or other small heirloom variety (do NOT use baking potatoes)
1 tsp thyme
1tbsp kosher salt
~1/4c olive oil
2 cloves garlic, finely chopped
1 tsp paprika
a few grinds of black pepper
1/4c grated hard cheese
2 tbsp bread crumbs

Boil potatoes until soft enough to poke with a fork (apx 20 minutes). Preheat the oven to 450, and slice larger potatoes into bite sized pieces. Place into casserole dish. Add salt and spices, drizzle with oil, and toss to coat each piece. Top with cheese and bread crumbs, bake until brown and bubbly.

Chicken breast:
4 boneless, skinless chicken breasts
2 tbsp olive oil
1 tsp thyme
1/2tsp sage
1 tsp rosemary
1 tsp kosher salt
1/2 tsp garlic powder

Combine spices in a small bowl. Rub each chicken breast with the mix. Put olive oil in a skillet (cast iron is my hands-down favorite) and heat on medium. Cook until each side is browned, about 7 to 8 minutes on each side. Serve with a lemon wedge if desired.

Voila! Dinner is served. This is a relatively quick meal, if you're using multiple burners and maximizing your time it can be done in 30 minutes.

Panko Asparagus

I was doodling around one of my favorite used book stores downtown when I found the cookbook section -- jackpot! After lots of comparison and debating with myself, I decided on The Garden Fresh Vegetable Cookbook by Andrea Chesman. She's a gardener who cooks almost strictly seasonally; similar to the Animal, Vegetable, Miracle venture for Barbara Kingsolver, seasonal cooking involves making the most of what's growing in your garden when its at its best. My mom and stepdad are fans of this as well, during the mid to late summer their garden looks like a little piece of Eden! I'll include some later sections on growing some of your own produce, so sit tight.

Anywho. Back to Ms. Chesman. One of the things about this book that caught my eye is that it has a section for each vegetable, and one of those veggies is asparagus. I've always (well, in my adult life) had an appreciation for asparagus but the vegetable itself seemed a little...intimidating. I had tried a few methods of cooking and while they turned out fine, I felt I must have been doing something wrong since I wasn't getting the "tender and sweet" vegetable these books were raving about.

I ran across a recipe for Asparagus Sticks. This was intriguing; a new way to make asparagus?! Considering I had two bunches in my refridgerator haunting me, I decided to give it a whirl. I used white asparagus because it's what I had, but either type will do.

A few notes on this recipe -- panko is a Japanese style bread crumb. I bought them because it's what the recipe called for, plus they were cheap and on sale. If you can't find them I see no problem with using regular bread crumbs, the panko is mostly for texture (as photos will demonstrate). It's similar to gratings you get from a Microplane zester, which is a must-have for any kitchen aficianado! I used mine to grate the parmesean for this recipe, which definitely assisted in the texture.

Chesman says that the lemon juice is essential and brings all the flavors together. I agree, but I also think the end flavor might be a little intense for some people. The kid in me enjoyed these sticks dipped in marinara sauce, so don't be afraid to branch out. Speaking of which, this would probably be a successful way to sneak vegetables into your kids' diets ;]

Panko Asparagus Sticks

1 egg
1/2tsp Dijon mustard
salt & pepper to taste
3/4c panko
1/2c shredded parmesean or other hard cheese
15-30 asparagus spears (this number is based more on how much you want to eat, batter is flexible)

1. Trim or snap asparagus. If you're unsure how to do this, hold each end of the spear and bend -- it will always snap in the right place, where the fibrous stalk ends and the tender veggie begins. For most cuts of spears at the store, this is around halfway. Note that you can still keep the fibrous portions to flavor other dishes, so don't throw them away just yet! (recipe coming soon)

2. In a shallow bowl, whisk the egg, mustard, pepper and salt together. On a plate, combine the panko and cheese. Preheat the oven to 400, and lightly grease a baking sheet with olive oil.

3. Dip each spear into the egg mixture, then roll in crumbs to coat. Place on the baking sheet.

4. Bake for 12-15 minutes, then flip to the other side. Bake for another 12-15 minutes or until fully browned. Serve with a lemon wedge.

In terms of taste, these were pretty darn good. They were messy though. Something I would suggest is slicing the asparagus you plan to use in half once more to create smaller pieces -- the fibers were the main culprit for the mess, but on some pieces that snapped on their own it wasn't a problem.

The little balls you see are makeshift hush puppies. Thanks to my Southern upbringing, nothing in my kitchen goes to waste! I even have tiny tupperware containers for storing leftover eggs or whites from recipes calling for yolks-only. I still had a good bit of panko and egg mix left over, so I mixed them and rolled them into balls. I baked them with the spears and they came out just fine, very close to "real" hush puppies.

Friday, May 2, 2008

Classic Marinara

Ah, marinara sauce. One of the essentials of a kitchen, it remains a mystery in a glass jar for most. I decided to give it a whirl after reading up on the basics and consulting my mom, who is also a fan of cooking fresh foods. It took a few tries but this is the method I've found that produces the most flavorful, full bodied sauce.

Note that the wine in the final step is critical -- quality doesn't necessarily matter, but the type you use will affect the end product. White wine tends to create a mild orange marinara, comparable to a lean vodka sauce. Red wine will produce a deep burgundy or bright red spicy sauce depending on which you choose; zinfandel produces the darkest sauce, while pinot noir creates a zesty "summertime" marinara.

The first step is roasting the tomatoes. To pit them, slice each in half and use a spoon to scoop out the seeds.

Roasted tomatoes:
3 lbs roma tomatoes, pitted
1/2c olive oil
1 bulb garlic, finely chopped
1 small onion, finely chopped
1 tbsp thyme
2-3 tbsp oregano
3 tbsp basil
1/4 tsp chili powder
2 tbsp kosher salt

Preheat oven to 300. Place tomatoes pitted side-up in a large baking pan, combine garlic onion spices and salt and sprinkle over tomatoes. Drizzle with olive oil. Cover the pan with tin foil and let simmer for 2 1/2 hours. Crank the heat up to 500 for 25 more minutes, and remove to cool.

Sauce:
1/2c wine of choice
2 tbsp tomato paste

Take roasted tomatoes and blend in a food processor for 15-30 seconds, or until pureed. Note that there should be some olive oil and spices left in the pan; these are great served with fresh bread, so don't blend them in or chuck them out. Simmer the processed tomatoes in a saucepan with paste, add wine and stir often for 20-30 minutes. Serve fresh.

Chocolate Chip Meringue Cookies


This is another gem from Cast Sugar's blog (check her out for some awesome baking ideas!) Again, it's slightly modified with less sugar and a little bit simpler to make. The ingredients themselves are very similar to your typical chocolate chip cookies, but they are actually cookie bars. They're also quite rich, so cut them on the smaller side.

This is the second time I've made these, my roommates and friends seem to like them a lot. They would be a huge hit at any party or get together; the perfect cookie bar to pair with a glass of milk.

Chocolate Chip Meringue Cookies

Cookie crust:

2c cake flour
1 stick butter, room temp
1/4 tsp kosher salt
1/4tsp baking soda
1 tsp baking powder
1/4c granulated sugar
1/2c brown sugar
3 egg yolks
1 tsp vanilla
1-12oz package of milk chocolate chunks

Meringue topping:


3 egg whites
3/4c brown sugar

Preheat the oven to 350. Cream the butter and sugars for the crust together, add egg yolks and vanilla. Add dry ingredients. Note that this will be a crumbly, somewhat dry mixture. Add chocolate chips. Spread into a brownie pan and tap down with the back of a wooden spoon.

The meringue takes several minutes of mixing, this is one thing I did note. Combine the sugar and egg whites, beat on high until glossy and "soft peaks" form. Spread over cookie crust. Bake for 25 minutes or until top of meringue begins to brown, let cool for at least 15 minutes. Serve and indulge.

Baked Macaroni and Cheese


This is the comfort food of a lifetime. My great grandmother made it, my grandmother had her recipe, and my mom had her own version. The way I make it is to minimize saturated fat, but sometimes when I've been sick I'll cook it the way my mom did (plenty of butter). This dish actually became quite well known among my college friends as well; leftovers were rare in those days! However, this does preserve well for a few days, so don't be afraid to put the excess in tupperware for later. Try this on a cold day when you need a hearty warming side dish.

I use olive oil in this dish, but a lot of people don't like the flavor of EVOO. Feel free to substitute vegetable oil or, God forbid, butter.

Baked Macaroni and Cheese

Sauce:

2c lowfat milk
1/4c olive oil
1/2c shredded sharp cheddar
2 tbsp all purpose flour
salt to taste

Heat the milk and oil in a double boiler or over low heat in a small saucepan. When hot, add flour and stir well. Continue stirring and adding cheese and salt. Set aside to cool.

Macaroni:
1 box (12 oz dry) penne pasta
1c shredded sharp cheddar
1/4c bread crumbs + 1 tbsp melted butter (optional)

Boil and drain penne. Combine with sauce, and spread in a "9 x "9 baking pan or casserole dish. Top with cheddar and bread crumbs if desired. Bake at 450 for 10-15 minutes or until golden and bubbly; set aside to cool for 20 minutes. Cooling is important, as it makes the macaroni "scoopable". Enjoy!

Pink Lemonade Cupcakes

I ran across these on Cast Sugar's blog, who ran across them on Daisycakes' blog. Each version undergoes a slight transformation, and mine has been no different! They're adorable pretty pink cupcakes with a nice lemony touch. I added a little rosewater to my icing to give it that "candy shop" olfactory taste; as you will soon know, I have a soft spot for olfactory dishes.

Although making these was lots of fun and they turned out fine, my craving had been satisfied after eating a few and I was left with a plate of leftovers. These would be perfect to bring to a barbeque or party, so I'm keeping this recipe around.

Pink Lemonade Cupcakes

Cupcakes:

1c cake flour
1/2tsp baking powder
1/4tsp baking soda
pinch of kosher salt
1/2c sugar
1/4c veg. oil
2 egg whites
1/3c thawed frozen pink lemonade concentrate
1/4c buttermilk
pink food coloring
muffin liners

Frosting:
3c confectioners sugar
1 stick softened butter
1/8tsp salt
2 tbsp lemonade concentrate
pink food coloring
1 tsp rosewater (check among the spices in the baking aisle)

Heat the oven to 350. Combine the dry ingredients in a large bowl and set aside. Cream the oil, egg whites, sugar, concentrate and milk in a bowl. Add the dry ingredients gradually, finishing with a few drops of food coloring. Fill liners about 3/4 full and bake for 25 minutes or until tops of cakes spring back when touched.

Cream the butter together with the confectioner's sugar. Add the concentrate and food coloring, mix well, and finish by adding the rosewater. Beat until smooth and set aside.

Top the cupcakes with frosting when cool, and sprinkle with pink sugar. I added a rosebud on top of each cake as well. These are perfect served with a fruity summer tea; bon appetit!

Fun with Sourdough


There are few things more delectable than steaming fresh sourdough. While yeast breads are fine and have their place in many dishes, there's something special about sourdough. Maybe it's the labor of love or the savory scent of wild yeast as it bakes; either way, once you get the hang of it, no other bread can compare (except maybe a braid of cinnamon challah).

Every great loaf of bread begins with a starter. Many people choose to make their own, but seeing as even I have time limits in my kitchen, I decided to order a fresh starter. King Arthur Flour, who publishes an awesome catalog and makes great bread flour, sells a fresh starter that's been kept alive for nearly 300 years! This guarantees a distinctive, fully developed taste -- I highly recommend giving theirs a try. They also include some great recipes and detailed instructions on how to care for your starter.

This is a recipe I happened upon while experimenting with breads to go with pasta and Italian dishes, but it's delicious enough to eat on its own. Never underestimate what you can do to a basic recipe with a well stocked spice cabinet!

There are a few pointers I can give for turning out your best, most stress-free loaf. The first is to get a baking stone; you can either purchase one at a cooking store or make do with some unfinished quarry tiles. Especially if you're like me and operating with a gas stove, this is an investment that can last a lifetime if you care for it. Remember to preheat the oven to 450-500 degrees at least an hour before baking, that way the stone can get fully heated. In addition to this is a pizza or bread peel, which you can find at restaurant supply stores. You powder it with cornstarch, stick the loaf to it and slide the bread onto the stone -- easy as pie!

Another piece of equipment that is vital to my kitchen is my countertop Kitchen-Aid mixer. I'm not sure where my culinary skills would be without this! They tend to be a bit pricey, but are worth every penny. They can handle most doughs with ease where a regular mixer would combust. They're also great for multitasking, as you can let things knead or mix while working on another aspect of the recipe. I keep three different attachments for mine -- a whisk for general mixing, a bread hook, and a flat attachment that works wonders for meringue and whipped cream.


Rustic Italian Sourdough

Sponge:
1c fresh "fed" starter
3c bread flour
1 1/2c warm water

Combine these ingredients in a large, non-reactive bowl. Cover with plastic wrap and allow to "sponge" for 6-12 hours. I tend to let mine sponge overnight, so begin this recipe the day before you plan to serve it.

Bread:
Sponge
2-3c flour
1 tbsp kosher salt
1/2 c finely grated hard cheese (Asiago works well)
2 tbsp oregano
Garlic olive oil
cornstarch

Knead or mix your sponge with the remaining flour. Add the salt, herbs, and cheese, and knead until smooth and elastic. Grease a large bowl with garlic oil, place and turn the dough into it. Cover and allow to rise for around an hour.

Splice the dough into two loaves. Knead each into a round and allow to rise for 1-2 more hours, until doubled in size. Slice the tops of each loaf and place on cornstarched peel. Slide onto baking stone, and bake for 20-25 minutes at 450. Serve hot.

I like to hand shape my loaves to maximize the "crustiness" of each piece. If you want an even thicker crust, mist the loaf with water midway through baking. I like to serve this particular loaf with cream cheese. Enjoy!

Back In Action with Spring Rolls

I know I've been MIA for the last few months -- moving sure can be hectic! But I've mastered my new kitchen and learned to make LOTS of yummy things that I'll be posting (along with photos!) It's amazing what one can learn in 2 months, eh?


I'll start the spring/summer food season with a fresh classic: spring rolls. In my egg roll adventure, which I'll elaborate on soon, I had a crisis in the grocery store. There were no egg roll wraps to be found. I wasn't going to let that defeat me, so in scouring the Asian foods section, I found "spring roll skins". Needless to say, I couldn't wait to get home and try them out!


Spring roll skins are interesting things. They come in a plastic round container and reminded me a bit of those big lenses we would play with in science class. In my initial attempt, I tried to fry the spring rolls. It wasn't a complete disaster but came close -- because the skins are so fragile and damp, they tend to bubble and pop in oil. I wound up double wrapping my rolls, which tasted fine but had a rather sticky texture.


Speaking of which, these skins can be super adhesive, so work with them with wet hands. The best way to prepare them is to get a cake pan or large skillet with hot (not boiling) water, and immerse the skins individually for about 15 seconds. Take them out, and you're ready to roll!


BASIC VEGGIE SPRING ROLLS:


Filling:
1/2 small head cabbage, chopped
~ 1/2 lb of tofu, cubed
1 grated carrot
1 nest mung bean threads (also known as sai fun, check Asian markets or the Asian foods section of your grocery store)
1c cooked sushi rice (optional)
1-2 tbsp salt to taste

*note - I like to keep some filling in a tupperware container ready-made, so chances are good you'll have some leftovers here. They can be frozen if you don't plan to use it up within a few days.

Take the veggies and bean noodles and lightly steam for a few minutes to soften. Combine your filling ingredients in a large bowl with a fork, you may want to chop the noodles into 3-4 sections to make this easier. With your prepared spring roll skin on a flat surface, put a few tablespoons of filling in the center of the skin. Take the left edge of the skin and fold over to the right -- imagine the filling is a "baby" and you're tucking it in. Fold the top and bottom ends toward the center, and roll the rest of the skin to the right.


photo courtesy of Jolinda Hackett

I recommend serving these fresh with tamari on the side, but any kind of sauce will do. Photos and nutritional info coming soon!