
These were more of a challenge than you'd think -- mash the dough together, roll it out and bake, right? It turns out there's a big difference between a biscuit (a hard piece of salty bread) and a true Southern buttermilk biscuit. I'd had some buttermilk left over from the pie so I decided to give these a whirl. While they didn't turn out terribly, they definitely could have come out better. For that reason I'm leaving an "improved" recipe and method, along with some helpful information about ingredients.
White Lily flour is touted as the best for making biscuits; it's made from soft winter wheat and has a low protein content. Thanks to Pinch My Salt, I have some good info on different flours and what they do:
The less protein a flour has, the better it is for "quick" breads like biscuits and pizza crusts. A higher protein flour, which also tends to produce more gluten, is better for risen and yeast breads. Hence, bread flour has the most protein while cake flour has the least. I tend to keep cake flour, all purpose flour, self-rising and bread flour in my kitchen along with a little wheat gluten. You can add some of this to all purpose flour to create bread flour, check the box for exact measurements. Long story short, low protein flour creates a light and fluffy bread while high protein flour assists in rising. Here are exact protein percentages:
Cake flours (Swans Down, Softasilk):7.5 to 8.5% proteinBleached southern all-purpose (White Lily, Martha White, Gladiola, Red Band):7.5 to 9.5% protein
National brand self-rising (Gold Medal, Pillsbury):9 to 10% protein
National brand bleached all-purpose (Gold Medal, Pillsbury): 10 to 12% protein
Northern all-purpose (Robin Hood, Hecker’s):11 to 12% protein
Northern unbleached all-purpose (King Arthur):11.7% protein
Bread Flour:11.5 to 12.5% protein
Pinch My Salt suggests using a combination of cake and all purpose flour if you don't have White Lily; this is what I did and it seemed to work.
Pinch My Salt's Buttermilk Biscuits
1-1/4c cake flour
3/4c all-purpose flour
1 1/2tsp baking powder
1/2tsp baking soda
1/2tsp salt
1/4c butter
3/4c buttermilk
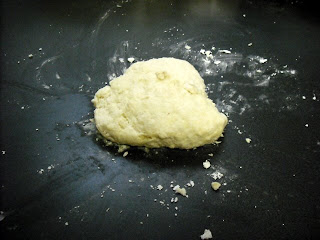
Grease a baking sheet and preheat the oven to 450. Combine dry ingredients in a large bowl. Using a dough cutter (a handle with several U-shaped wires), cut the butter into the dry ingredients. It should look like crumbs. Add your buttermilk and shape into a ball.
Knead the dough a few times on a floured surface and roll out. I rolled mine too thin, about 1/2 an inch, I suggest making them about an inch thick. Make sure to coat the surface and rolling pin with flour so there's no sticking. Once your dough is flat, use either a cookie cutter or the top of a drinking glass to cut the biscuits out. Shape the remaining dough into biscuit shapes and place on the cookie sheet. Bake for 10-12 minutes.
Here are a few tips from Salt on how to make the best biscuits:
Make sure your baking powder, baking soda, and/or self-rising flour are fresh!
Start preheating the oven as soon as you start thinking about making the biscuits! You want the oven to be completely preheated before the biscuits go in.
Prepare your ingredients and tools in advance so that once you get started, you can work quickly and efficiently: cut your butter in small pieces and put it back in the fridge, measure out the buttermilk, flour the counter, get out the biscuit cutter and baking sheet.
Use very cold butter, keep it in the fridge until you’re ready for it. Work the butter quickly into the flour so that it doesn’t have a chance to even think about melting!
When you add the buttermilk, stir lightly! This can be done simply with a fork. You just want to get the dough to a point where the flour is all clumped together, not a smooth dough!
Knead lightly and minimally. You aren’t kneading this like bread dough, you are simply finishing the mixing process with your hands. You only want to knead a couple of times to finish dispersing the liquid through the dough. The more you knead, the denser your biscuits will be!
Even if you use self-rising flour in the dough, dust the counter and dough with all-purpose flour. Self-rising flour can give the outside of the biscuits a bitter taste, due to the leavening it contains.
Don’t pat the dough out too thin. If you want high biscuits, don’t roll the dough any thinner than 3/4 - 1 inch.
When cutting biscuits, use a sharp cutter and press straight down and up. Don’t twist! This was the hardest tip for me to adapt. I have always twisted the biscuit cutter. But guess what, it makes a difference!
Place cut biscuits together on the baking sheet so that they are touching. Again, this is something I have never done. But I found that the biscuits do rise well and I really enjoy the texture of the soft-sided biscuits!
Don’t re-roll the scraps. Since it is best to work the dough as little as possible, instead of gathering the scraps, re-rolling and cutting into biscuits, just form the scraps into biscuit shapes by hand. I usually end up with scraps to form two extra biscuits. They might look a little funny, but they rise as well as the others and they taste just as good!
No comments:
Post a Comment