It's the season to break into your spice cabinet to find flavor to compensate for the fresh, green variety of summer. This isn't a bad thing, though -- it can result in adding a new twist to an old favorite. This recipe can be made in any amount any number of ways (by adding pureed fruits or vegetables, mainly) as long as you stick to the formula of 1/4 cup milk, 1/4 cup flour per 1 egg.
Salted saffron can be made in a hurry if you have a mortar and pestle. Combine coarse salt with a good pinch of red saffron threads. Let the threads sit out in the open for at least 20 minutes. Then use the mortar and pestle to grind them together until you get a grainy orange mixture.
You'll need:
2 eggs
1/2 cup whole milk
1/2 cup flour
1 tsp salted saffron
1 heaping tsp ground turmeric
cream cheese, baked camembert or creme fraiche to serve alongside
Whisk together the milk and eggs, and then add the flour and spices. Mix until thoroughly blended and bright yellow and let the batter sit for 20 minutes.
Preheat the oven to 450 degrees and pour the batter into a very greased, nonstick 9 inch cake pan. Bake for 15 minutes or until slightly browned, then allow it to cool for about 10 minutes. Serve it with a soft, subtle cheese and a side of honeyed figs.
Showing posts with label breakfast. Show all posts
Showing posts with label breakfast. Show all posts
Sunday, January 4, 2015

Sunday, January 3, 2010
Vegan Spiced Vanilla Kasha
Kasha was a dish I got very familiar with in Russia -- it's a hot cereal made from roasted buckwheat, usually cooked in milk. As someone excessively averse to sausages and other breakfast meats, this became my first meal of the day nearly every day for the second portion of the trip.
What was served, however, is not exactly this. This recipe is a professionalized version of what I mixed myself every morning in the cafeteria. The kasha served was bland and not quite salty, not quite sweet so I bought lot of vanilla sugar and cinnamon at the store and used them to add some flair.
I made mine in a rice cooker, but the same method would apply if you were using a large covered pot over medium-low heat.
Ingredients:
14 oz can regular coconut milk
2/3 cup sugar
1 tsp vanilla extract
2 tsp cinnamon
1 cup rinsed buckwheat grains
6 oz water
Set all ingredients to cook for 45 minutes on the stove top or however long specified by your rice cooker. With the exception of a dash of sugar, it shouldn't need anything else before serving.
What was served, however, is not exactly this. This recipe is a professionalized version of what I mixed myself every morning in the cafeteria. The kasha served was bland and not quite salty, not quite sweet so I bought lot of vanilla sugar and cinnamon at the store and used them to add some flair.
I made mine in a rice cooker, but the same method would apply if you were using a large covered pot over medium-low heat.
Ingredients:
14 oz can regular coconut milk
2/3 cup sugar
1 tsp vanilla extract
2 tsp cinnamon
1 cup rinsed buckwheat grains
6 oz water
Set all ingredients to cook for 45 minutes on the stove top or however long specified by your rice cooker. With the exception of a dash of sugar, it shouldn't need anything else before serving.
Monday, March 2, 2009
Tahitian Blinis
Tahitian blinis -- it's a contradiction in and of itself. Blinis, also known as blin or blintzes, are a traditional Russian food often seen in Jewish cooking as well. Pineapple and vanilla don't need an explanation, but when combined they create a taste that is way beyond the sum of its parts. I like to put a little vanilla extract in the syrup pineapple comes stored in, it adds a hint of luxuriousness to an otherwise simple and sunny fruit. Blinis are often filled with everything from meat and cream cheese to various regional fruits.
This recipe took a bit of practice; without going into detail I'll just say that the initial first attempt at the filling was an utter failure. The blinis themselves took some handling but I got the hang of it by the second or third one. The batter is supposed to be very thin, and a large nonstick skillet without tapered sides is your best bet (i.e. the flat portion at the bottom of the skillet is large versus curving inward like a wok). This gives the batter plenty of surface area to spread out and create the characteristic thinness. You could also use a crepe maker, as the dishes are quite similar. This recipe makes around 20 blin, but they store very well in a freezer bag in the fridge for a couple of days. I found them much easier to work with the second day.
Ingredients for blinis:
4 eggs
1 1/2c whole milk
1 1/2c flour
1/2 tsp salt
3 tbsp sugar
Whisk together the eggs and milk. Add the salt and sugar and continue to whisk. Finally, add the flour and whisk until the batter is smooth. Place a large nonstick skillet over medium heat, I used a tiny bit of butter before each blin to make them easier to handle after cooking. Using a 1/4c measuring cup, put one scoop of batter in the skillet. Allow to cook for 2-3 minutes or until the sides begin to curl up and you can shimmy a spatula under the blin. Flip and allow the other side to cook for about 30 seconds, then take the pan and flip the blin onto a plate. Do this until you're out of batter.
Filling:
*This makes enough filling for all the blinis, adjust accordingly if you're making fewer and don't want leftovers. This goes nicely on bagels as well.*
1 1/2c finely chopped and shredded pineapple (if you're getting it from a can, strain all the syrup out first and reduce the sugar by 2-3 tsp)
12 oz cream cheese
8 tsp sugar
1 1/2 tsp vanilla extract
Let the cream cheese soften to room temperature and cream it with the sugar and vanilla extract. Mix in the pineapple until the consistency is about even and there are no chunks of cream cheese left.
Taking the blini, put a tablespoon or two of filling into the center. The way you roll these is very similar to the egg roll method; bring the right edge over, tuck the top edge down and the bottom edge up and roll from the folded side. Once all of these are done you can either serve them as is or fry them.
Some people choose to fry these, especially on Hanukkah when frying is a religious observance. To do this, heat about an inch of vegetable oil over medium heat in a skillet. Very carefully place the blinis seam side up in the pan; you will probably have to hover by them and use a spatula or tongs to keep the seams from falling apart. After a few minutes flip to the other side with tongs. Allow to brown for another minute or so and transfer to a paper towel. Do the same with the rest of the blinis; fit as many as you can into the pan without crowding them and giving yourself ample space for flipping. Serve and enjoy!
This recipe took a bit of practice; without going into detail I'll just say that the initial first attempt at the filling was an utter failure. The blinis themselves took some handling but I got the hang of it by the second or third one. The batter is supposed to be very thin, and a large nonstick skillet without tapered sides is your best bet (i.e. the flat portion at the bottom of the skillet is large versus curving inward like a wok). This gives the batter plenty of surface area to spread out and create the characteristic thinness. You could also use a crepe maker, as the dishes are quite similar. This recipe makes around 20 blin, but they store very well in a freezer bag in the fridge for a couple of days. I found them much easier to work with the second day.
Ingredients for blinis:
4 eggs
1 1/2c whole milk
1 1/2c flour
1/2 tsp salt
3 tbsp sugar
Whisk together the eggs and milk. Add the salt and sugar and continue to whisk. Finally, add the flour and whisk until the batter is smooth. Place a large nonstick skillet over medium heat, I used a tiny bit of butter before each blin to make them easier to handle after cooking. Using a 1/4c measuring cup, put one scoop of batter in the skillet. Allow to cook for 2-3 minutes or until the sides begin to curl up and you can shimmy a spatula under the blin. Flip and allow the other side to cook for about 30 seconds, then take the pan and flip the blin onto a plate. Do this until you're out of batter.
Filling:
*This makes enough filling for all the blinis, adjust accordingly if you're making fewer and don't want leftovers. This goes nicely on bagels as well.*
1 1/2c finely chopped and shredded pineapple (if you're getting it from a can, strain all the syrup out first and reduce the sugar by 2-3 tsp)
12 oz cream cheese
8 tsp sugar
1 1/2 tsp vanilla extract
Let the cream cheese soften to room temperature and cream it with the sugar and vanilla extract. Mix in the pineapple until the consistency is about even and there are no chunks of cream cheese left.
Taking the blini, put a tablespoon or two of filling into the center. The way you roll these is very similar to the egg roll method; bring the right edge over, tuck the top edge down and the bottom edge up and roll from the folded side. Once all of these are done you can either serve them as is or fry them.
Some people choose to fry these, especially on Hanukkah when frying is a religious observance. To do this, heat about an inch of vegetable oil over medium heat in a skillet. Very carefully place the blinis seam side up in the pan; you will probably have to hover by them and use a spatula or tongs to keep the seams from falling apart. After a few minutes flip to the other side with tongs. Allow to brown for another minute or so and transfer to a paper towel. Do the same with the rest of the blinis; fit as many as you can into the pan without crowding them and giving yourself ample space for flipping. Serve and enjoy!
Monday, January 12, 2009
Panettone French Toast
January is a magical month -- namely, magical in the sense of post-Christmas sales. Everything from winter coats to holiday food staples are redlined, put under clearance signs and left to fend for themselves in the masses of holiday crazed bargain hunters. After a few weeks, the remnants of the holidays are all but gone, the last of which to go are the grocery store items. All the cans of pumpkin have been reshelved, the boxes of dark brown sugar safely nestled with other forms of glucose rather than being precariously stacked in the produce aisle.
It was amid these skeletons of the festivities of 2008 that I came across Panettone on sale at Whole Foods. Especially for Italians, this bread is the very symbol of the holidays and joins the ranks of other seasonal superstars like the latke and Christmas cookies. It's a very soft, almost cakelike bread with raisins, candied orange zest, citron and other things I'm surely forgetting that's been allowed to proof for over 30 hours. In it's regular form it's the perfect complement to a cup of coffee or tea, a jovial breakfast loaf to be enjoyed for the days of recuperation in early January.
So, what exactly is my not-at-all-Italian self doing with such an "inside" staple? I can't take complete credit for this masterpiece; Foodblogga posted a lovely recipe for this dish, along with the suggestion on the box. Not all French toast is created equal, even if it's made with Italian bread. My verdict on the dish itself? PHENOMENAL! The best French toast I've ever eaten -- it's creamy on the inside, slightly crispy on the outside and packed with a symphony of flavors. It was almost a little too sweet, but that may have been thanks to my generosity with the maple syrup.
It was amid these skeletons of the festivities of 2008 that I came across Panettone on sale at Whole Foods. Especially for Italians, this bread is the very symbol of the holidays and joins the ranks of other seasonal superstars like the latke and Christmas cookies. It's a very soft, almost cakelike bread with raisins, candied orange zest, citron and other things I'm surely forgetting that's been allowed to proof for over 30 hours. In it's regular form it's the perfect complement to a cup of coffee or tea, a jovial breakfast loaf to be enjoyed for the days of recuperation in early January.
So, what exactly is my not-at-all-Italian self doing with such an "inside" staple? I can't take complete credit for this masterpiece; Foodblogga posted a lovely recipe for this dish, along with the suggestion on the box. Not all French toast is created equal, even if it's made with Italian bread. My verdict on the dish itself? PHENOMENAL! The best French toast I've ever eaten -- it's creamy on the inside, slightly crispy on the outside and packed with a symphony of flavors. It was almost a little too sweet, but that may have been thanks to my generosity with the maple syrup.
Ingredients for 3 large servings:
3 slices of panettone, apx "1 in thickness
3 eggs
1 tsp vanilla extract
1 tsp cinnamon
3/4c whole milk
maple syrup
butter for the skillet
Combine the milk, vanilla, cinnamon and eggs. Whisk together until uniform. Place each slice of the panettone into the custard and let it soak for exactly 30 seconds; flip and do the same for the other side. Heat a skillet over medium low and melt some butter to prevent sticking. Very carefully place the slices of bread in the skillet (they will be really fragile). After 3-5 minutes, or when the bread is browned when you peek under it, flip and brown the other side. Serve hot with a bit of maple syrup or confectioner's sugar.
3 slices of panettone, apx "1 in thickness
3 eggs
1 tsp vanilla extract
1 tsp cinnamon
3/4c whole milk
maple syrup
butter for the skillet
Combine the milk, vanilla, cinnamon and eggs. Whisk together until uniform. Place each slice of the panettone into the custard and let it soak for exactly 30 seconds; flip and do the same for the other side. Heat a skillet over medium low and melt some butter to prevent sticking. Very carefully place the slices of bread in the skillet (they will be really fragile). After 3-5 minutes, or when the bread is browned when you peek under it, flip and brown the other side. Serve hot with a bit of maple syrup or confectioner's sugar.
Monday, June 2, 2008
Southern Buttermilk Biscuits

These were more of a challenge than you'd think -- mash the dough together, roll it out and bake, right? It turns out there's a big difference between a biscuit (a hard piece of salty bread) and a true Southern buttermilk biscuit. I'd had some buttermilk left over from the pie so I decided to give these a whirl. While they didn't turn out terribly, they definitely could have come out better. For that reason I'm leaving an "improved" recipe and method, along with some helpful information about ingredients.
White Lily flour is touted as the best for making biscuits; it's made from soft winter wheat and has a low protein content. Thanks to Pinch My Salt, I have some good info on different flours and what they do:
The less protein a flour has, the better it is for "quick" breads like biscuits and pizza crusts. A higher protein flour, which also tends to produce more gluten, is better for risen and yeast breads. Hence, bread flour has the most protein while cake flour has the least. I tend to keep cake flour, all purpose flour, self-rising and bread flour in my kitchen along with a little wheat gluten. You can add some of this to all purpose flour to create bread flour, check the box for exact measurements. Long story short, low protein flour creates a light and fluffy bread while high protein flour assists in rising. Here are exact protein percentages:
Cake flours (Swans Down, Softasilk):7.5 to 8.5% proteinBleached southern all-purpose (White Lily, Martha White, Gladiola, Red Band):7.5 to 9.5% protein
National brand self-rising (Gold Medal, Pillsbury):9 to 10% protein
National brand bleached all-purpose (Gold Medal, Pillsbury): 10 to 12% protein
Northern all-purpose (Robin Hood, Hecker’s):11 to 12% protein
Northern unbleached all-purpose (King Arthur):11.7% protein
Bread Flour:11.5 to 12.5% protein
Pinch My Salt suggests using a combination of cake and all purpose flour if you don't have White Lily; this is what I did and it seemed to work.
Pinch My Salt's Buttermilk Biscuits
1-1/4c cake flour
3/4c all-purpose flour
1 1/2tsp baking powder
1/2tsp baking soda
1/2tsp salt
1/4c butter
3/4c buttermilk
Grease a baking sheet and preheat the oven to 450. Combine dry ingredients in a large bowl. Using a dough cutter (a handle with several U-shaped wires), cut the butter into the dry ingredients. It should look like crumbs. Add your buttermilk and shape into a ball.
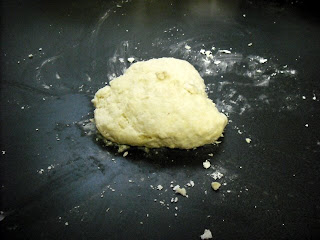
Knead the dough a few times on a floured surface and roll out. I rolled mine too thin, about 1/2 an inch, I suggest making them about an inch thick. Make sure to coat the surface and rolling pin with flour so there's no sticking. Once your dough is flat, use either a cookie cutter or the top of a drinking glass to cut the biscuits out. Shape the remaining dough into biscuit shapes and place on the cookie sheet. Bake for 10-12 minutes.
Here are a few tips from Salt on how to make the best biscuits:
Make sure your baking powder, baking soda, and/or self-rising flour are fresh!
Start preheating the oven as soon as you start thinking about making the biscuits! You want the oven to be completely preheated before the biscuits go in.
Prepare your ingredients and tools in advance so that once you get started, you can work quickly and efficiently: cut your butter in small pieces and put it back in the fridge, measure out the buttermilk, flour the counter, get out the biscuit cutter and baking sheet.
Use very cold butter, keep it in the fridge until you’re ready for it. Work the butter quickly into the flour so that it doesn’t have a chance to even think about melting!
When you add the buttermilk, stir lightly! This can be done simply with a fork. You just want to get the dough to a point where the flour is all clumped together, not a smooth dough!
Knead lightly and minimally. You aren’t kneading this like bread dough, you are simply finishing the mixing process with your hands. You only want to knead a couple of times to finish dispersing the liquid through the dough. The more you knead, the denser your biscuits will be!
Even if you use self-rising flour in the dough, dust the counter and dough with all-purpose flour. Self-rising flour can give the outside of the biscuits a bitter taste, due to the leavening it contains.
Don’t pat the dough out too thin. If you want high biscuits, don’t roll the dough any thinner than 3/4 - 1 inch.
When cutting biscuits, use a sharp cutter and press straight down and up. Don’t twist! This was the hardest tip for me to adapt. I have always twisted the biscuit cutter. But guess what, it makes a difference!
Place cut biscuits together on the baking sheet so that they are touching. Again, this is something I have never done. But I found that the biscuits do rise well and I really enjoy the texture of the soft-sided biscuits!
Don’t re-roll the scraps. Since it is best to work the dough as little as possible, instead of gathering the scraps, re-rolling and cutting into biscuits, just form the scraps into biscuit shapes by hand. I usually end up with scraps to form two extra biscuits. They might look a little funny, but they rise as well as the others and they taste just as good!
Tuesday, May 20, 2008
Honey Braided Challah
This is a great holiday bread and doubles as a nice breakfast loaf. It's sweet without being demanding and is perfect with cream cheese or honey butter. Many traditions include seeds or certain herbs sprinkled over the top; sesame seeds work well for this particular loaf.
Honey Cinnamon Challah:
7c bread flour
1 tbsp kosher salt
1/2c agave nectar (low glycemic sweetener, check health food stores or well stocked grocers)
2 packets of yeast dissolved in 1/3c warm water
1/2c veg oil
2 tbsp apple pie spice
4 eggs
1c boiling water
1/2c cold water
1 egg + 2 tbsp honey + 1 tbsp water (set aside)
Beat eggs in a bowl. In separate large bowl mix oil, nectar, spices, salt and add boiling water. Stir until completely dissolved. Add cold water, stir, and add yeast water -- keep in mind that the mixture should be warm, not hot, before the addition of yeast. Add eggs to the large bowl. Combine flour 1/2-1c at a time, as certain climates require more or less of it. If you're kneading by hand, knead for about 15 minutes or until smooth and elastic; if you're using a bread hook it takes around five to ten minutes. Place loaf into a greased bowl and let rise, covered, in a warm place for an hour or until doubled in size.
Before punching the dough down, remove from the bowl and slice into thirds with a sharp knife. Knead each round for 2-5 minutes and use the sharp knife to divide each into thirds again. Roll each section into a "snake" about 1-2 inches in diameter. Pinch the top ends together and braid down the loaf, then pinch the bottom ends and tuck under. Repeat this with the 2 remaining rounds and let each rise on a greased baking sheet for 30-45 minutes. Right before the loaves are ready to go in the oven, take a pastry brush and coat each with the egg and honey mixture. Make sure to cover all exposed areas of the loaf except for the bottom. Sprinkle seeds if desired.
Preheat the oven to 450 with your baking stone, and reduce to 350 for the actual baking time. If you're operating with a baking sheet only, flour with cornmeal or semolina and allow it to preheat. Place the loaf on a greased large plate or a floured peel and slide it onto the baking stone or sheet. Allow to bake for 20-30 minutes or until loaf is a deep golden brown.
Honey Cinnamon Challah:
7c bread flour
1 tbsp kosher salt
1/2c agave nectar (low glycemic sweetener, check health food stores or well stocked grocers)
2 packets of yeast dissolved in 1/3c warm water
1/2c veg oil
2 tbsp apple pie spice
4 eggs
1c boiling water
1/2c cold water
1 egg + 2 tbsp honey + 1 tbsp water (set aside)
Beat eggs in a bowl. In separate large bowl mix oil, nectar, spices, salt and add boiling water. Stir until completely dissolved. Add cold water, stir, and add yeast water -- keep in mind that the mixture should be warm, not hot, before the addition of yeast. Add eggs to the large bowl. Combine flour 1/2-1c at a time, as certain climates require more or less of it. If you're kneading by hand, knead for about 15 minutes or until smooth and elastic; if you're using a bread hook it takes around five to ten minutes. Place loaf into a greased bowl and let rise, covered, in a warm place for an hour or until doubled in size.
Before punching the dough down, remove from the bowl and slice into thirds with a sharp knife. Knead each round for 2-5 minutes and use the sharp knife to divide each into thirds again. Roll each section into a "snake" about 1-2 inches in diameter. Pinch the top ends together and braid down the loaf, then pinch the bottom ends and tuck under. Repeat this with the 2 remaining rounds and let each rise on a greased baking sheet for 30-45 minutes. Right before the loaves are ready to go in the oven, take a pastry brush and coat each with the egg and honey mixture. Make sure to cover all exposed areas of the loaf except for the bottom. Sprinkle seeds if desired.
Preheat the oven to 450 with your baking stone, and reduce to 350 for the actual baking time. If you're operating with a baking sheet only, flour with cornmeal or semolina and allow it to preheat. Place the loaf on a greased large plate or a floured peel and slide it onto the baking stone or sheet. Allow to bake for 20-30 minutes or until loaf is a deep golden brown.
Wednesday, May 7, 2008
White Peach Breakfast Tart
This is a specifically modified version of the original breakfast tart, which is usually made with a combination of apples and jellies or jams. White peaches are especially popular in Japan for their light, delicate taste and aroma. This is another recipe where I add rosewater; if you don't like the effect this brings feel free to leave it out or replace with vanilla extract. The olfactory taste of roses combined with fruit is especially decadent; soft and sweet without a hint of tartness. The yogurt takes the place of richer alternatives like whipped cream.
Tart crust:
~2 tbsp butter
2 eggs
1/8tsp kosher salt
1/2c flour
1/2c milk
2tbsp sugar
Grease cake pan with butter. Combine remaining butter with other ingredients, and bake at 400 degrees for 20 minutes.
Filling:
4 oz container vanilla yogurt
4 oz can white peaches (check Asian markets)
2 tbsp peach preserves
a few drops rosewater if desired, use sparingly
1-2 tbsp confectioners sugar
Heat peaches, rosewater and preserves over medium-low heat. Spread vanilla yogurt over tart crust. Once fruit begins to simmer, remove from heat and pour evenly over yogurt layer. Sprinkle with confectioners sugar and either serve hot or chill until ready to eat.
Tart crust:
~2 tbsp butter
2 eggs
1/8tsp kosher salt
1/2c flour
1/2c milk
2tbsp sugar
Grease cake pan with butter. Combine remaining butter with other ingredients, and bake at 400 degrees for 20 minutes.
Filling:
4 oz container vanilla yogurt
4 oz can white peaches (check Asian markets)
2 tbsp peach preserves
a few drops rosewater if desired, use sparingly
1-2 tbsp confectioners sugar
Heat peaches, rosewater and preserves over medium-low heat. Spread vanilla yogurt over tart crust. Once fruit begins to simmer, remove from heat and pour evenly over yogurt layer. Sprinkle with confectioners sugar and either serve hot or chill until ready to eat.
Subscribe to:
Posts (Atom)