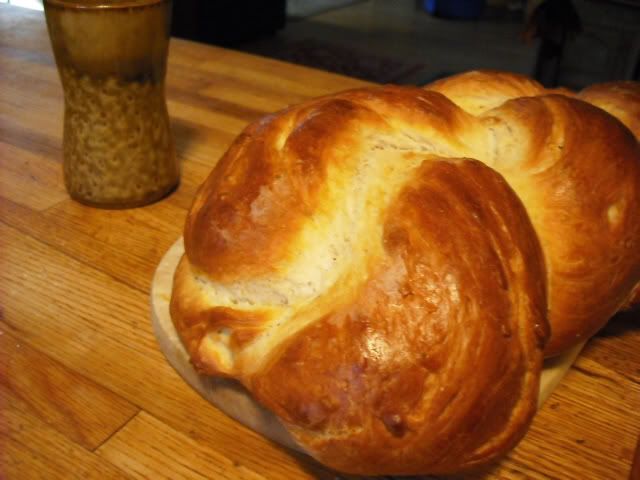
There are few things more delectable than steaming fresh sourdough. While yeast breads are fine and have their place in many dishes, there's something special about sourdough. Maybe it's the labor of love or the savory scent of wild yeast as it bakes; either way, once you get the hang of it, no other bread can compare (except maybe a braid of cinnamon challah).
Every great loaf of bread begins with a starter. Many people choose to make their own, but seeing as even I have time limits in my kitchen, I decided to order a fresh starter. King Arthur Flour, who publishes an awesome catalog and makes great bread flour, sells a fresh starter that's been kept alive for nearly 300 years! This guarantees a distinctive, fully developed taste -- I highly recommend giving theirs a try. They also include some great recipes and detailed instructions on how to care for your starter.
This is a recipe I happened upon while experimenting with breads to go with pasta and Italian dishes, but it's delicious enough to eat on its own. Never underestimate what you can do to a basic recipe with a well stocked spice cabinet!
There are a few pointers I can give for turning out your best, most stress-free loaf. The first is to get a baking stone; you can either purchase one at a cooking store or make do with some unfinished quarry tiles. Especially if you're like me and operating with a gas stove, this is an investment that can last a lifetime if you care for it. Remember to preheat the oven to 450-500 degrees at least an hour before baking, that way the stone can get fully heated. In addition to this is a pizza or bread peel, which you can find at restaurant supply stores. You powder it with cornstarch, stick the loaf to it and slide the bread onto the stone -- easy as pie!
Another piece of equipment that is vital to my kitchen is my countertop Kitchen-Aid mixer. I'm not sure where my culinary skills would be without this! They tend to be a bit pricey, but are worth every penny. They can handle most doughs with ease where a regular mixer would combust. They're also great for multitasking, as you can let things knead or mix while working on another aspect of the recipe. I keep three different attachments for mine -- a whisk for general mixing, a bread hook, and a flat attachment that works wonders for meringue and whipped cream.
Every great loaf of bread begins with a starter. Many people choose to make their own, but seeing as even I have time limits in my kitchen, I decided to order a fresh starter. King Arthur Flour, who publishes an awesome catalog and makes great bread flour, sells a fresh starter that's been kept alive for nearly 300 years! This guarantees a distinctive, fully developed taste -- I highly recommend giving theirs a try. They also include some great recipes and detailed instructions on how to care for your starter.
This is a recipe I happened upon while experimenting with breads to go with pasta and Italian dishes, but it's delicious enough to eat on its own. Never underestimate what you can do to a basic recipe with a well stocked spice cabinet!
There are a few pointers I can give for turning out your best, most stress-free loaf. The first is to get a baking stone; you can either purchase one at a cooking store or make do with some unfinished quarry tiles. Especially if you're like me and operating with a gas stove, this is an investment that can last a lifetime if you care for it. Remember to preheat the oven to 450-500 degrees at least an hour before baking, that way the stone can get fully heated. In addition to this is a pizza or bread peel, which you can find at restaurant supply stores. You powder it with cornstarch, stick the loaf to it and slide the bread onto the stone -- easy as pie!
Another piece of equipment that is vital to my kitchen is my countertop Kitchen-Aid mixer. I'm not sure where my culinary skills would be without this! They tend to be a bit pricey, but are worth every penny. They can handle most doughs with ease where a regular mixer would combust. They're also great for multitasking, as you can let things knead or mix while working on another aspect of the recipe. I keep three different attachments for mine -- a whisk for general mixing, a bread hook, and a flat attachment that works wonders for meringue and whipped cream.

Rustic Italian Sourdough
Sponge:
1c fresh "fed" starter
3c bread flour
1 1/2c warm water
Combine these ingredients in a large, non-reactive bowl. Cover with plastic wrap and allow to "sponge" for 6-12 hours. I tend to let mine sponge overnight, so begin this recipe the day before you plan to serve it.
Bread:
Sponge
2-3c flour
1 tbsp kosher salt
1/2 c finely grated hard cheese (Asiago works well)
2 tbsp oregano
Garlic olive oil
cornstarch
Knead or mix your sponge with the remaining flour. Add the salt, herbs, and cheese, and knead until smooth and elastic. Grease a large bowl with garlic oil, place and turn the dough into it. Cover and allow to rise for around an hour.
Splice the dough into two loaves. Knead each into a round and allow to rise for 1-2 more hours, until doubled in size. Slice the tops of each loaf and place on cornstarched peel. Slide onto baking stone, and bake for 20-25 minutes at 450. Serve hot.
I like to hand shape my loaves to maximize the "crustiness" of each piece. If you want an even thicker crust, mist the loaf with water midway through baking. I like to serve this particular loaf with cream cheese. Enjoy!

